Hey everyone, it’s Jake here from your go-to voltage stabilizer crew, and today we’re diving into something I get asked about all the time: “How do I actually install this thing without messing it up?” I swear, half the emails I get are from people who either bought our stabilizer and are staring at a box of parts like, “Wait, is this for my fridge or my toaster?” or guys who tried installing a cheap knockoff from a random online store and fried their whole AC last week. Yeah, that’s a thing—don’t skip this step, okay? I’ve seen way too many people wing it and end up with bigger problems than just a wobbly power supply. This post is gonna be straight-up, no fancy jargon, just what you need to do step by step, plus a few pro tips only people who’ve installed 1000+ of these will know. Let’s get into it. Voltage Stabilizer
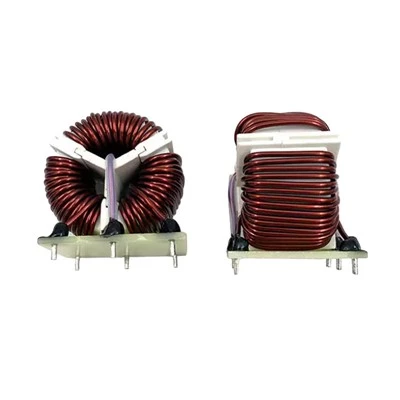
First off, let’s get one thing straight: voltage stabilizers aren’t “one size fits all.” I know that sounds basic, but you’d be shocked how many people buy a 1kVA stabilizer for their whole house (we’ve had folks do that) and wonder why it can’t even keep their phone charger running. Before you even touch a screwdriver, you gotta double-check two things: what’s your home’s total power draw, and what’s your incoming line voltage. How do you find that? Easy—grab your energy bill, it’ll list your average monthly kWh, or if you have a smart meter, just check the live wattage when all your big appliances are running. For most small apartments, that’s like 2-3kVA max; houses with central AC or electric stoves? 5-10kVA usually. If you skip this, you’re wasting money on a stabilizer that’s too small or buying one that’s way overkill (don’t do that, it’s a waste of cash). Also, turn off your main circuit breaker. Like, don’t just flip the light switch off—kill the whole power to your house. I know it sounds like overkill, but I once had a kid (we’re cool now, he bought his second stabilizer from us last month) who forgot and almost shocked his hand so bad he dropped a screwdriver through his TV. Safety first, always.
Okay, step 1: Pick the right spot for your stabilizer. Where you put this thing matters a lot more than you think. First, it needs to be somewhere dry—no bathrooms, no basements that flood, no outside if it’s pouring rain. Water and electricity don’t mix, duh. Second, it needs ventilation. These things generate a little heat when they’re running, so don’t stuff it in a tiny cabinet or lean it against the wall with nothing. I always tell people to leave at least 6 inches of space on all sides, top, bottom, front, back. If you put it somewhere stuffy, it’ll overheat and shut down, or even break faster. Also, make sure it’s accessible. You don’t wanna have to move your couch every time you need to check the indicator light or reset it after a power surge. Most people mount ours on the wall near the main circuit breaker (that’s the big box where all your breakers are) and that works perfect. If you’re plugging it in temporarily for testing, just put it on a sturdy table or shelf, not the floor—pets or kids can knock it over, and floor spots collect dust which clogs the vents.
Next step: Run the wires. Hold up, if you’re not comfortable working with electrical wires, call an electrician. Seriously. I’m not trying to guilt you, but if you can’t tell a neutral wire from a hot wire, don’t mess with it. But if you’ve done basic home projects before (like changing a light fixture) and feel up to it, let’s go. First, take the cover off your main circuit breaker box—most just pop off with a screwdriver. Inside, you’ll see three main wires: the hot (that’s the one with the insulation, usually black or red), neutral (white), and ground (green or bare copper). Now, your stabilizer will have its own set of wires: usually two for input (goes to the main breaker) and two for output (goes to the appliances you wanna protect) plus a ground wire. Wait, important: the input is the wire coming from your main grid, the output is what goes to your devices. Don’t mix those up. I’ve seen guys connect input to their fridge and output to the grid, and the stabilizer just did nothing. Pain. Alright, strip about ½ inch of insulation off the ends of the wires (don’t strip too much, you don’t want exposed copper touching anything else) and screw them into the correct terminals. The stabilizer’s input wires go to the main line coming from the power company, output goes to your home’s circuit that feeds your big appliances (or the whole house, if it’s a whole-house unit). Ground wire goes to the ground bar in your breaker box—that’s the metal bar all the ground wires are screwed into. Once you’ve tightened all the screws, double-check every single connection. Loose wires are the #1 cause of stabilizer failures, way more than anything else. Wiggle each wire a little to make sure it’s not coming loose. If you’re using a plug-in stabilizer (not hardwired), that’s even easier—just plug the input cord into a dedicated wall outlet, no messing with the breaker box. We have a ton of plug-and-play models for apartments that renters can install without even touching the breaker box, and those are super popular, by the way.
Wait, test time. Before you turn the power back on, make sure all the stabilizer’s switches are off. Find the power switch on the stabilizer, flip it to “off” if it’s not already. Now, go back to your main breaker box, flip that on, and wait 2 minutes for the power to settle. Then, flip the stabilizer’s power switch to “on.” You should see lights—most stabilizers have a power light, a “good voltage” light, and a “surge” light. If the power light comes on and the good voltage light is lit up, that’s a win. Now test it: plug a lamp or your phone charger into the output side, make sure it works. If the good voltage light is flashing or not on, that means it’s not getting the right power, or you mixed up the wires. Don’t panic—just turn everything off, double-check your connections, and try again. I once spent 20 minutes troubleshooting a client’s setup and realized he had the input and output wires swapped. Oops, that’s a beginner move, don’t let that be you. Also, if you have a surge light, that’s gonna come on if there’s a big power spike, and it’ll reset on its own usually, but if it’s staying on, that means it absorbed a big surge and might need a quick check.
Now, a few pro tips from the team here that we don’t shout about enough. First, don’t plug high-wattage devices into the same outlet as the stabilizer. Wait, no—actually, plug the stabilizer first into the main power, then plug your big stuff (AC, fridge, washer, dryer) into the stabilizer’s output. Don’t plug the stabilizer into an extension cord if you can avoid it. Extension cords cause voltage drops, which defeats the whole purpose of the stabilizer. If you need it in a different spot, run a dedicated wire, or just use a short, heavy-duty extension cord (14-gauge or lower) for small devices, but not for big appliances. Second, don’t overload your stabilizer. Like I said earlier, if you have a 5kVA stabilizer, don’t plug in a 6kVA AC and heater at the same time. Our stabilizers have built-in overload protection that will cut power if you do that, which is good, but it’s annoying to have to reset it every time you turn your dryer on. So calculate your total wattage before you pick a stabilizer, and leave about 10% extra space for unexpected stuff—like if you add a new TV later, you don’t have to buy a whole new stabilizer. Third, get it serviced once a year. Even if it’s working fine, dust and dirt build up in the vents, and the connections can get loose over time. We offer annual checkups for our customers, but even if you do it yourself, just take the cover off, blow out the dust with a can of air, and check all the wires. Most people forget this and wonder why their stabilizer dies after 2 years, not 5 or 6 like it should.
Wait, what if you’re renting and can’t hardwire it? No problem, we make a bunch of plug-in models that are perfect for renters. They just plug into a standard wall outlet, and then you plug your appliances into the stabilizer. No tools, no messing with the breaker box, super easy. I installed one in my apartment last year, took me 2 minutes, and my AC has been running smooth ever since. If you’re not sure which model to get, just shoot us a message or pick up the phone—we’re here to help, no sales pitch, just real advice. We had a customer last week who was on the fence between a 2kVA and 3kVA model, and I walked her through her energy use over the phone, and she got the 2kVA which was exactly what she needed, saved her like $50. That’s the stuff we care about.
Also, let’s talk about common mistakes I see all the time. One: putting the stabilizer outside. Yeah, I know power outages are common in some areas, but our stabilizers are designed for indoor use. Putting them outside in the sun or rain will fry the circuit board in no time. Two: ignoring the installation instructions. I know, I know, nobody reads them, but the little booklet that comes with your stabilizer has the exact voltage specs, wire size, and step-by-step for your specific model. Don’t skip that, even if you think you know what you’re doing. Three: not turning off the main breaker before wiring. I can’t say this enough—electrical work is serious, and one wrong move can hurt you. If you’re even a little unsure, call a licensed electrician. It’s $100-$150, which is way cheaper than replacing a fridge or AC that got fried because you messed up the wiring.
At the end of the day, installing a voltage stabilizer isn’t rocket science. It’s just about taking your time, double-checking everything, and not cutting corners. The whole point is to protect your expensive appliances from weird power spikes, dips, and fluctuations that are super common no matter where you live. We’ve seen customers save thousands on repairs just by installing one of our stabilizers correctly. If you’ve already got one installed and you’re having issues, or you’re ready to buy one and want help picking the right size, just reach out to our team for a purchasing consultation. We’ll walk you through every step, no pressure, no pushy sales tactics.
Before I go, let’s recap the quick steps so you don’t forget: 1. Confirm your power needs to pick the right stabilizer size. 2. Turn off your main breaker. 3. Pick a dry, well-ventilated, accessible spot. 4. Wire the stabilizer (hardwired or plug-and-play). 5. Double-check all connections. 6. Turn on power and test. 7. Do annual maintenance. That’s it. Easy, right?
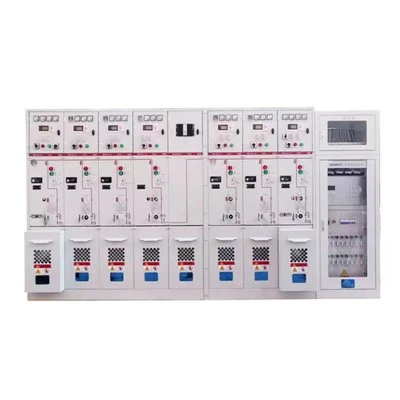
If you’ve installed a stabilizer before and have a question, or you’re just ready to chat about getting a system for your home or business, hit us up for a purchasing and installation consultation. We’re here to make sure you get the right setup the first time, no headaches. Don’t let power issues ruin your day—we’ve got your back.
Transformer References:
- National Electrical Code (NEC), Article 440: Voltage Stabilizers and Regulators, National Fire Protection Association, 2023.
- Energy Star: Best Practices for Protecting Home Appliances from Voltage Fluctuations, U.S. Environmental Protection Agency, 2022.
- Underwriters Laboratories (UL) Standard 1283: Electromagnetic Compatibility, UL LLC, 2021.
Wenzhou Mingyue Electric Co., Ltd.
As one of the most professional voltage stabilizer manufacturers and suppliers in China, we have world-leading production equipment and strong manufacturing capabilities. Please feel free to wholesale durable voltage stabilizer in stock here and get quotation from our factory. We also accept customized orders.
Address: No. 16, Zhongsan East Road, Donghuangyu Village, Liushi Town, Yueqing City, Wenzhou City, Zhejiang Province
E-mail: Hu17687922780@outlook.com
WebSite: https://www.cn-mingyue.com/
