If you run a manufacturing shop, you know that downtime on your CNC gear hobbing machine is one of the most expensive hits you can take. I’ve been supplying CNC gear hobbing machines for 12 years now, and the number one question my service team gets is: “How do I change a cutting tool on this thing without messing up my next job?” It’s not just about yanking out the old tool and slapping a new one in—skipping a step here can throw off gear tolerances, damage your machine, or even ruin a whole batch of parts. Today, I’m walking through the exact process we teach every one of our customers, based on real shop floor scenarios and the gear hobbing principles we’ve refined over thousands of machine installs. This isn’t a generic online tutorial pulled from a forum; this is the step-by-step we’ve used to keep our customers’ machines running smoothly, and it’s all tailored to our CNC gear hobbing line. CNC Gear Hobbing Machine

First, let’s start with the pre-change prep. Rushing this part is where most mistakes happen. I’ve seen a shop operator skip locking out the machine once and get caught by a sudden axis movement—resulted in a bent tool holder and a trip to the ER, all over a 2-minute shortcut. So first step, always perform lockout/tagout (LOTO) per your shop’s safety protocol. Our machines are built with redundant LOTO, but you should never skip double-checking that the control is in manual mode and the power is cut. Next, gather your tools specifically for CNC gear hobbing tool changes: the correct size Allen wrench (we label the exact size on the machine’s tool changer housing to avoid guessing), a torque wrench (critical—over-tightening is the #1 cause of tool holder wear on our machines), a clean lint-free cloth, a dab of anti-seize compound for the tool taper, and a caliper to check tool length later. Also, pull up the previous job’s tool data from the control’s memory. If you’re switching to a different hob for a new gear module, you’ll need that tool’s saved parameters preloaded. Pro tip from our service team: never leave a used hob lying on the shop floor—they’re sharp, heavy, and easy to knock over, which can chip the cutting teeth. If you’re taking a break mid-prep, set the old hob on a padded tool stand, not a hard concrete surface.
Now, accessing the tool. Our CNC gear hobbing machines have two main tool access points: the tool changer carousel (for scheduled, routine changes) and the direct tool mount at the work head (for emergency changes mid-job, though we recommend carousel changes when possible to avoid disrupting axis alignment). For a routine carousel change, start by navigating the control to the tool change subroutine. On our machines, this is a single button labeled “Tool Change” on the touchscreen, but we always walk customers through testing it once before running it at full speed. The key here is to make sure the work head is parked at its safe change position—we programmed that specific point into the control during installation, so never move it manually to access the tool; that can throw off the machine’s coordinate system, leading to off-center gears later. Once the carousel is in position, the tool mount will retract slightly, and you’ll hear a soft click meaning the tool’s locking pin has released. If you don’t hear that click, don’t force anything—go back to the control and re-run the tool change subroutine; the pin might just be sticking from a little metal shavings. I’ve had one customer who tried prying a stuck tool and ended up cracking the work head’s housing—don’t make that mistake.
Next, removing the old hob. Hold the old hob firmly with one hand (they weigh between 15 and 50 pounds, depending on size—so use your legs, not your back, to lift it once it’s free). Use your other hand to loosen the tool holder’s retention bolt with the Allen wrench, turning it counterclockwise slowly. As you loosen it, you’ll feel the tool start to slide out of the taper mount. Once it’s loose, lift it straight out—never twist it, because the tapers are precision-machined to a tolerance of 0.0001 inches, and twisting can scratch the surface, which will cause vibration and bad gear teeth. Once the old hob is out, take your lint-free cloth and wipe both the inside of the tool holder taper and the back of the hob’s mounting taper. This is non-negotiable—even a tiny metal shaving or a speck of coolant residue on the taper will throw the tool’s alignment off. I recommend doing this twice: once with a dry cloth, then once with a cloth lightly dampened with isopropyl alcohol, then letting it air dry for 10 seconds. No cleaning spray, no compressed air—compressed air can blow dirt into internal machine parts, and cleaning spray can leave a residue that builds up over time. I had a customer once skip this cleaning step and run a batch of 50 gears that all had uneven tooth spacing; we traced it to a 0.0002-inch shaving caught on the taper.
Now, installing the new hob. This part is where precision matters most. First, take your new (or properly sharpened and inspected) hob and check its mounting taper for any defects—small chips or scratches here will be noticeable later. If it’s good, add a tiny, thin layer of anti-seize compound to the back of the taper—only a dot the size of a pinhead; too much will attract metal shavings and cause the taper to bind. Hold the hob straight, aligning the keyway on the hob with the pin on the tool holder. Our machines have a keyway designed so it only fits one way—if it doesn’t slide in easily, don’t force it; you’ve got it turned 180 degrees. Push the hob all the way into the taper until it seats firmly, then hand-tighten the retention bolt clockwise a few turns until it stops. Now grab your torque wrench—this is the most important tool in the process. For our standard tool holders, the retention bolt needs to be torqued to 35 foot-pounds; we label this value on the machine’s service panel, but we also give every customer a cheat sheet in their operator manual. Using the wrong torque: under-tighten and the tool will slip mid-cut, ruining gears; over-tighten and you’ll strip the bolt or crack the tool holder. Set your torque wrench to 35 ft-lbs, then tighten the bolt until it clicks. Don’t go beyond that.
Once the new tool is in, you need to confirm it’s aligned properly. This is a step most beginners skip, but it’s how we ensure your gear tolerances stay within AGMA standards. First, back the work head out of the way slightly, then jog it slowly to bring the hob just 0.010 inches away from a test piece of scrap material (we recommend keeping a pre-cut scrap gear blank the same material as your production parts on hand for this). Run the spindle at a slow, idle speed—100 RPM for most steel gears, 200 RPM for aluminum—and make a light, 1/16-inch deep cut on the test blank. Stop the machine, pull the blank, and use a gear tooth micrometer or caliper to measure the tooth thickness. Compare that to the theoretical tooth thickness in your control’s tool data. If it’s off by more than 0.001 inches, you need to recheck the taper alignment—most of the time, that means removing the hob, cleaning the taper again, and re-seating it. Another quick check: spin the hob by hand (with power off, obviously) and listen for any uneven vibration or scraping. If it doesn’t spin smoothly, you didn’t seat it right, or there’s debris you missed.
Then, save the new tool data to your machine’s control. Our CNC gear hobbing machines automatically store tool parameters like diameter, number of teeth, and module, but you should double-check these against the specifications of the hob you just installed. This is also the time to update your tool management log—write down the date, the old tool’s serial number, the new tool’s serial number, and the torque value used. Good tool tracking helps with maintenance and sharpener scheduling, so you don’t end up with a worn tool mid-job.
Before you run your first production part, do one final safety check. Confirm all guards are locked in place—our machines have interlocks that will shut down the spindle if a guard is open, but never rely on that. Make sure the coolant lines are aimed correctly at the cutting zone; a dull or improperly installed tool generates more heat, so proper cooling will extend its life. Finally, run a single production part and inspect it for tooth profile errors, surface finish, and runout. If it looks good, you’re ready to go; if not, it’s back to checking the taper or the tool data.
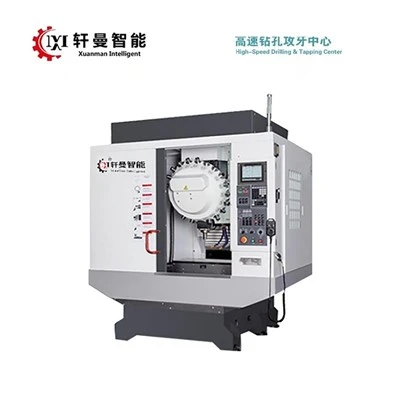
I can’t stress enough that this process is built for our CNC gear hobbing machines specifically. We engineered the tool holders and tapers to work this way, and cutting corners on any step will cost you down the line. As a supplier, our job isn’t just to sell you a machine—it’s to make sure you can operate it efficiently, with minimal downtime. That’s why we offer on-site training for every customer, and our service team is available 24/7 for any questions, whether it’s a tool change issue or a more complex operation. If you’re tired of struggling with tool changes that waste time and ruin parts, or if you’re looking to upgrade to a CNC gear hobbing machine that’s built for reliable, easy tool maintenance, our team is here to help. We work with shops of all sizes, from small job shops to large automotive suppliers, and we tailor our solutions to your specific gear production needs. Reach out to our team to discuss your requirements, and we’ll be in touch to walk through how our machines can fit your operation.
Vertical CNC Lathe References
- American Gear Manufacturers Association (AGMA) Standard 2001-A16: Gear Classification and Inspection Methods
- ISO 10360-2: Geometrical Product Specifications (GPS) – Evaluation of Coordinate Measuring Machines – Part 2: Measurement of Performance
- Machining Technology: Tooling for CNC Gear Cutting, Modern Machine Shop, 2022
- Service Manual for CNC Gear Hobbing Machines, Custom Machine Tools Inc., 2021
Jiangsu Xuanman Intelligent Equipment Co., Ltd.
As one of the most professional CNC gear hobbing machine manufacturers in China, we’re featured by quality products and low price. Please rest assured to buy discount CNC gear hobbing machine made in China here from our factory. Customized orders are welcome.
Address: No.1-1, Weier Road, Jieji Equipment Manufacturing Industrial Park, Sihong County, Suqian City, Jiangsu Province, China
E-mail: jsxmzn@163.com
WebSite: https://www.xm-machs.com/
